PROTAPER ULTIMATE SLIDER
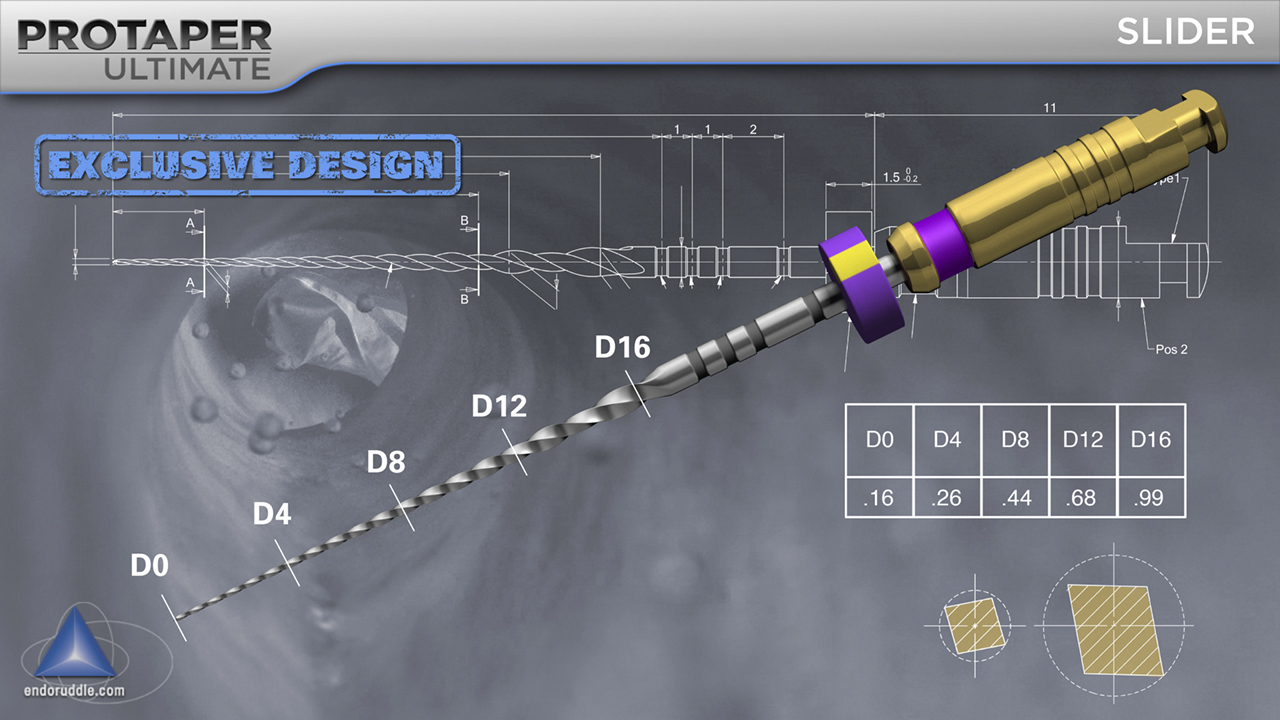
The Ultimate canal preparation method begins with the SLIDER as a rotary first concept. The SLIDER, with the purple silicone stop and identification ring on its handle, is utilized, in one or more passes, to negotiate, catheterize, and secure the majority of all canals. The SLIDER has a progressively changing cross-section that begins at D0 as a rhomboid and evolves into an ever-changing parallelogram along its active portion. The cross-sectional diameter of the SLIDER at D0, D4, D8, D12 and D16 is 0.16mm, 0.26mm, 0.44mm, 0.68mm, and approaching 1.00mm, respectively.
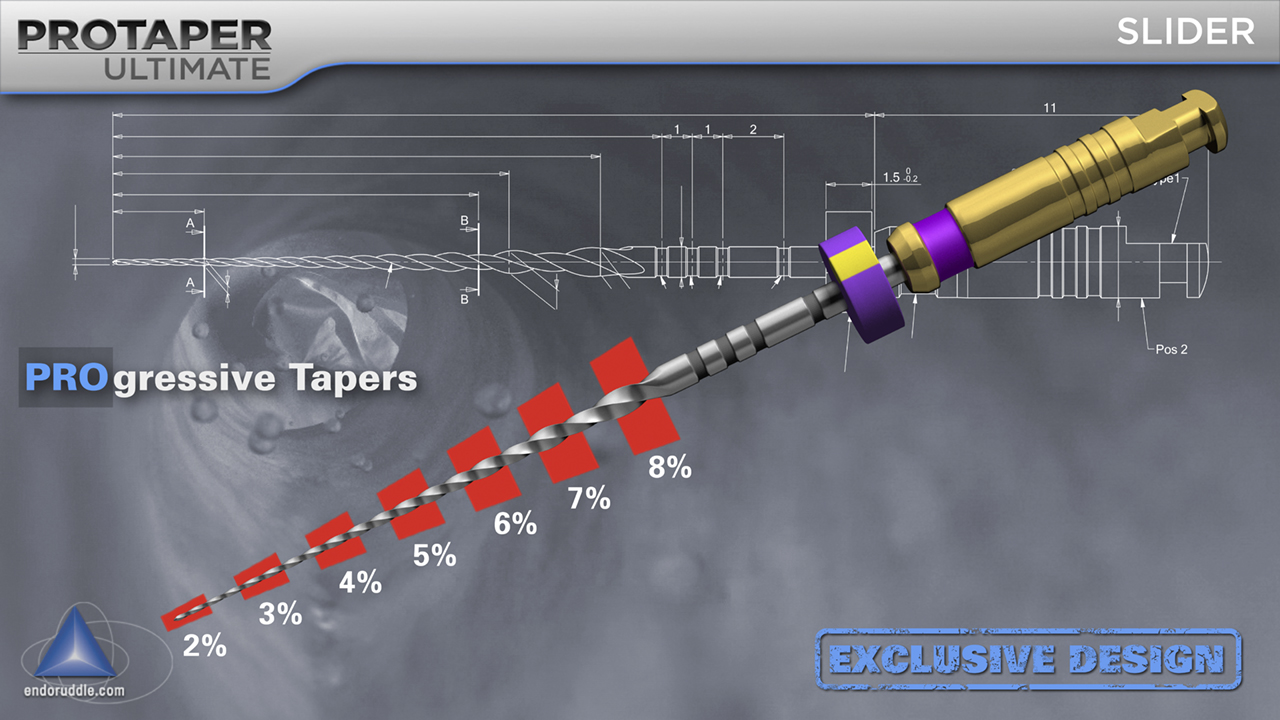
The SLIDER has an increasing percentage tapered design from 2%-8% across its active portion. This design feature fortuitously limits the contact between the file and dentin and allows the file to safely and selectively cut on its bigger, stronger, and more efficient blades between D4 and D12. With its progressively tapered design, changing cross-section, and M-wire specific heat treatment, this file represents a breakthrough in glide path management. The secret to SLIDER success is to let this file run passively inward and advance ever deeper into any given canal. NEVER push, peck, or otherwise force this file toward working length. Importantly, the SLIDER is always used in the presence of a viscous chelator, such as RC Prep, ProLube, or Glyde.
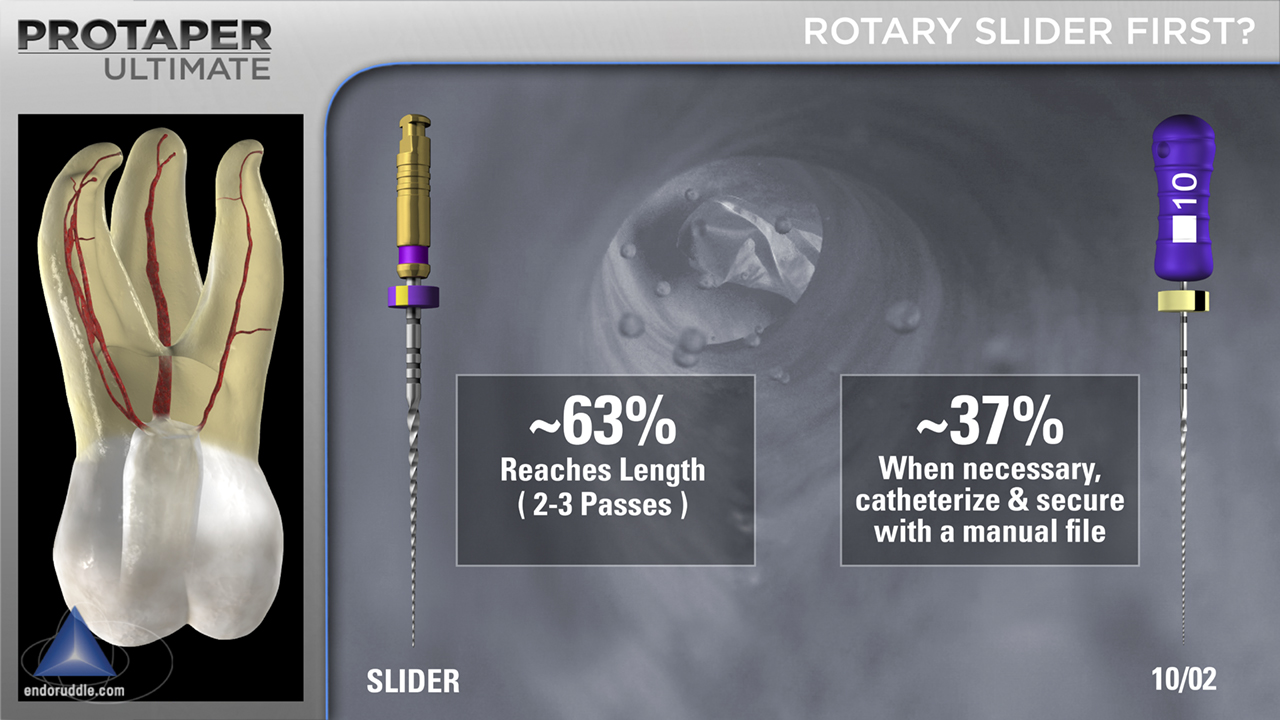
Following access, the vast majority of all teeth visually exhibit a readily identifiable orifice(s). In these instances, fill the pulp chamber with a viscous chelator and begin with a mechanically-driven SLIDER. International Key Opinion Leaders (KOLs) validated that 63% of the time, in natural posterior teeth, the SLIDER reached the desired working length in 2-3 passes, requiring NO hand files. This means 37% of the time, KOLs required small-sized manual files to reach the terminus, especially in those systems that exhibited deep divisions or abrupt curvatures. Mechanical glide path management is a significant breakthrough in endodontics as it reduces post-op pain, is super efficient, and provides a spacious tapered pathway to length for the SHAPER to follow.
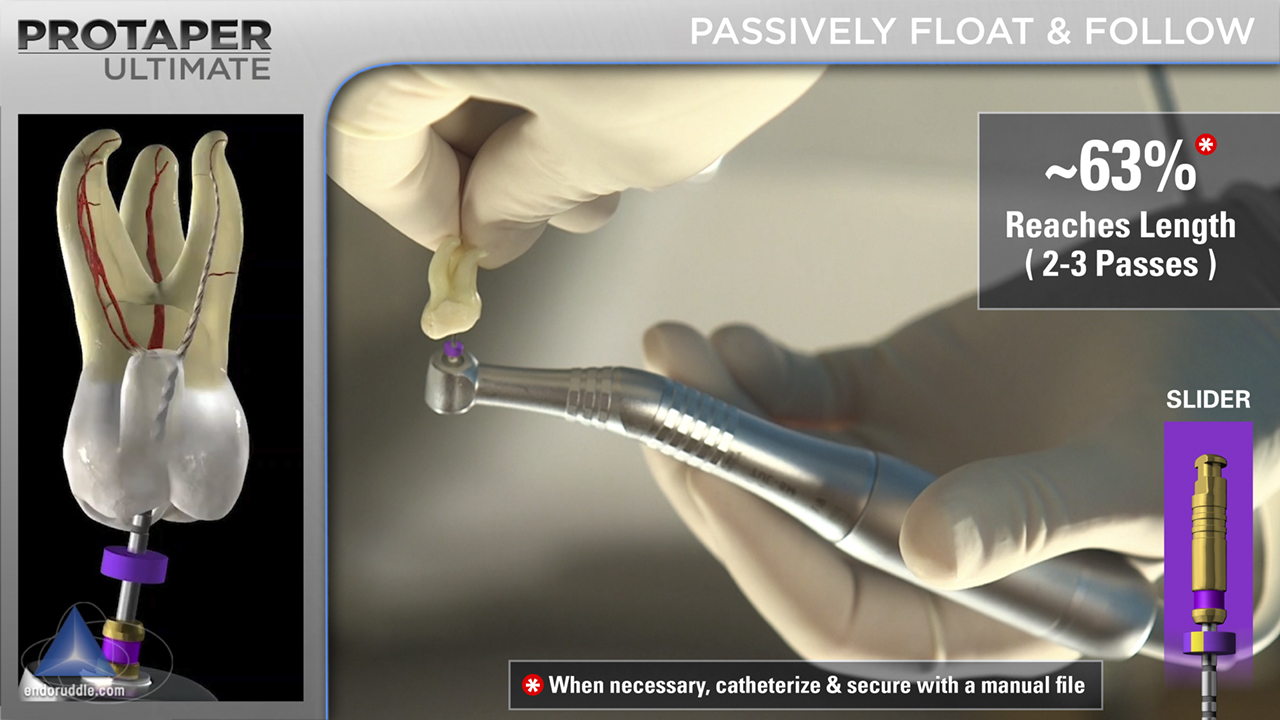
In the situation, where there is a demonstratable orifice, fill the pulp chamber with a viscous chelator such as RC Prep, ProLube, or Glyde. Initiate the glide path management procedure using the mechanically-driven SLIDER. Remember to set the stop on the shaft of the SLIDER at the diagnostic working length. Cradle the handpiece between your thumb and fingers and let the file passively begin to follow and progress ever deeper into the canal. To ensure safety, keep your fingers off the head of the handpiece to discourage pushing, pumping, or pecking; rather, let the SLIDER passively move inward, let it run, let it advance. The SLIDER can typically be carried to length in 2-3 passes. Then proceed to the SHAPER.